When it comes to safely archiving our work, we have certainly seen a lot of changes over the past two decades. We have gone from storing our transparencies and negatives in cardboard boxes (and hoping we never had a flood or fire), through to burning our work onto DVDs only to hoard them in cupboards… and it was a very tedious day at the studio whenever we had to search through negatives or discs looking for one particular image.
Over the past few years though, storage has become a lot easier and while some of us might still be using external hard drives to archive our work, most photographers are now using either the Cloud or NAS’s (Network Attached Storage).
The Cloud can be handy for sharing work with your clients while knowing that some angel up there is quietly managing the back-ups to the back-ups. But paying to store large archives of work can get expensive – and what happens when you forget to pay your storage bill or the Cloud itself crashes or is hacked?
I use the Cloud to deliver work to my clients but I rely on Synology NAS’s to archive my work.
Unlike external hard drives, a NAS uses multiple hard drives and a built-in computer to actively monitor and protect your data using RAID (Redundant Array of Inexpensive Disks) technology. Using SHR technology (Synology Hybrid RAID, which is similar to RAID-5), if one disk in your array should fail, your data remains safe on the other hard drives until you replace the failed drive. If you are extra cautious you can also use two disk redundancy using SHR-2 (also known as RAID-6), so that if two disks fail your data is still safe until you replace both drives.
The beauty of a NAS system though, is that the more bays (hence hard drives) you can have on the NAS, the more efficient the storage system becomes. For example, with SHR or RAID5, a two-bay NAS containing two 4TB drives will only give you 4TB of storage because each disk has to back up the other. If you have a five-bay NAS containing five-4TB drives though, you get 16-TB of usable storage using SHR or RAID5, and if any one of those five drives should fail, your data remains safe until the damaged drive is replaced. At that point the computer within the NAS replaces all the missing data onto the new drive and all five drives are ready to protect each other again. Worth noting is that the “Enterprise” grade hard drives are very reliable – I have been using NAS’s for eight years and in that time I have only ever had to replace one drive.
I have two Synology 5-Bay NAS’s stored away in my studio that connect to my network via a router, and I also have a third 4-Bay NAS that I keep off-site (just in case of flood or fire).
Some people let their NAS actively back up their computer’s main drive, but I prefer to let Apple’s Time Machine and an external hard drive do this work. Instead, I manually drag work across to my NAS’s once I am certain I have finished with the assignment and the client has paid their invoice. Once every few weeks I check off my statements against my invoices and if a job has been paid, that project gets dragged across to folders on each of my three servers; I then delete the work off my computer’s hard drive to make room for my next projects. (Most photographers will have their own way of reconciling accounts and managing data, but this works for me).
To get you started, here is a step by step guide to buying and setting up Network Attached Storage.
NB: At the end of this article are step by step screen shots of the whole process.
Step 1: Buy a NAS
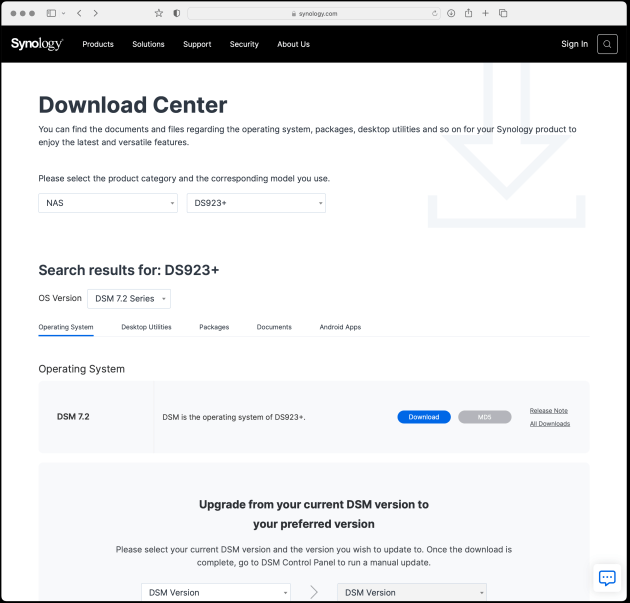
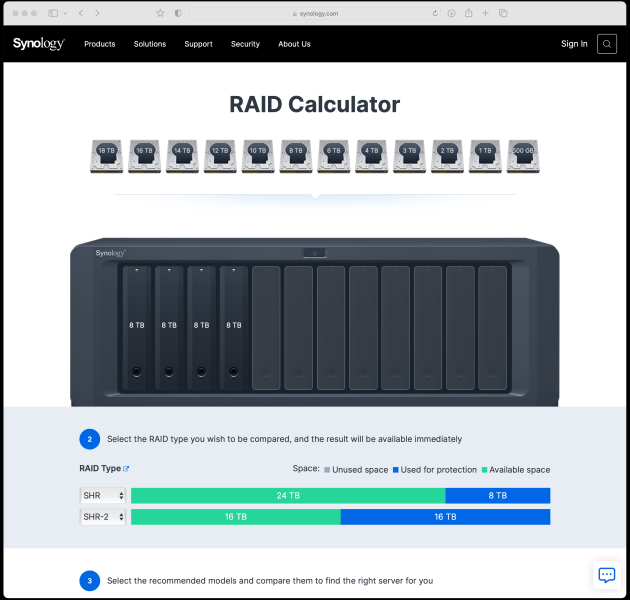
The first step is to buy a NAS, noting that as mentioned above, the more bays (therefore hard drives) that your NAS has, the better the overall storage efficiency. The Raid Calculator on Synology’s website is useful for exploring how many bays you might need, and how much storage you can have using one-disk redundancy (SHR or Raid 5) or two-disk redundancy (SHRII or Raid-6). For the novice, a 4-bay NAS such the popular Synology DS923+ NAS is a great starting point. A minimum 6-Bay NAS is recommended if you want to use two disk redundancy, but given the overall reliability of a NAS and the “enterprise” hard drives they use, a 4 or 5-bay NAS using SHR or RAID-5 should be more the adequate for most photographers.

Step 2: Buy Hard Drives
The next step is to buy some enterprise hard drives for the NAS; you will need one for each bay. If you are using a 4-bay NAS, a set of four 4TB hard drives (starting at about $200 each) will give you 12TB of storage with one disk redundancy using SHR / RAID-5. If you want more storage, a set of four 8TB drives (at about $350 each) will give you 24TB of storage using SHR / RAID-5 or if you are really keen, four 20TB drives ($800+ each) will give you about 60TB of protected storage.
Big tip: when buying NAS drives, make sure each drive has the same capacity – this will give you the maximum storage when using RAID.
Step 3: Install
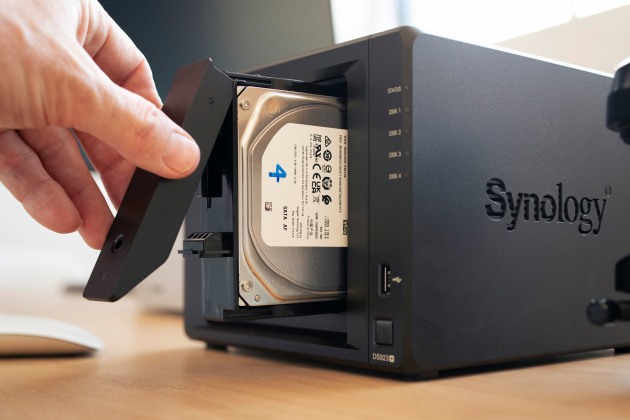
Take your NAS and hard drives back to the studio and start setting everything up. You can keep the NAS next to your computer, but the constant hum of the cooling fans might get a bit annoying. For this reason I suggest putting the NAS somewhere out of the way, where you have access to both power and a network router. Connect the NAS to the router using the supplied ethernet cable and then hook up the external power supply to the NAS. Now unpack the drives and follow the printed instructions (supplied with the NAS) to install them into the bays.
Big tip: Number each drive from left to right as you put the drives into the NAS. In the extremely unlikely event your NAS fails, being able to put the drives into a replacement NAS in exactly the same order will ensure that the RAID array will continue working without incident.

Step 4: Log In
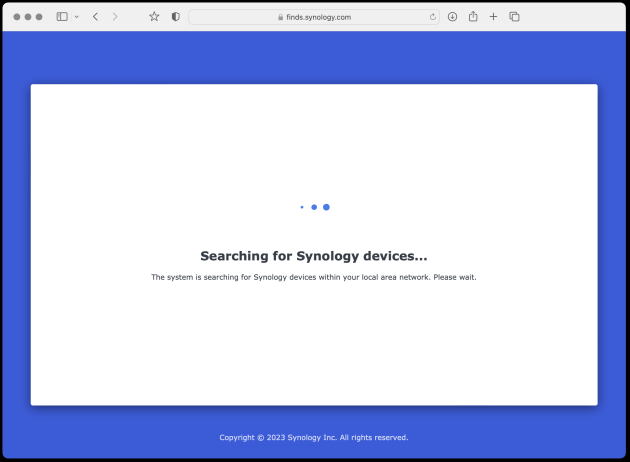
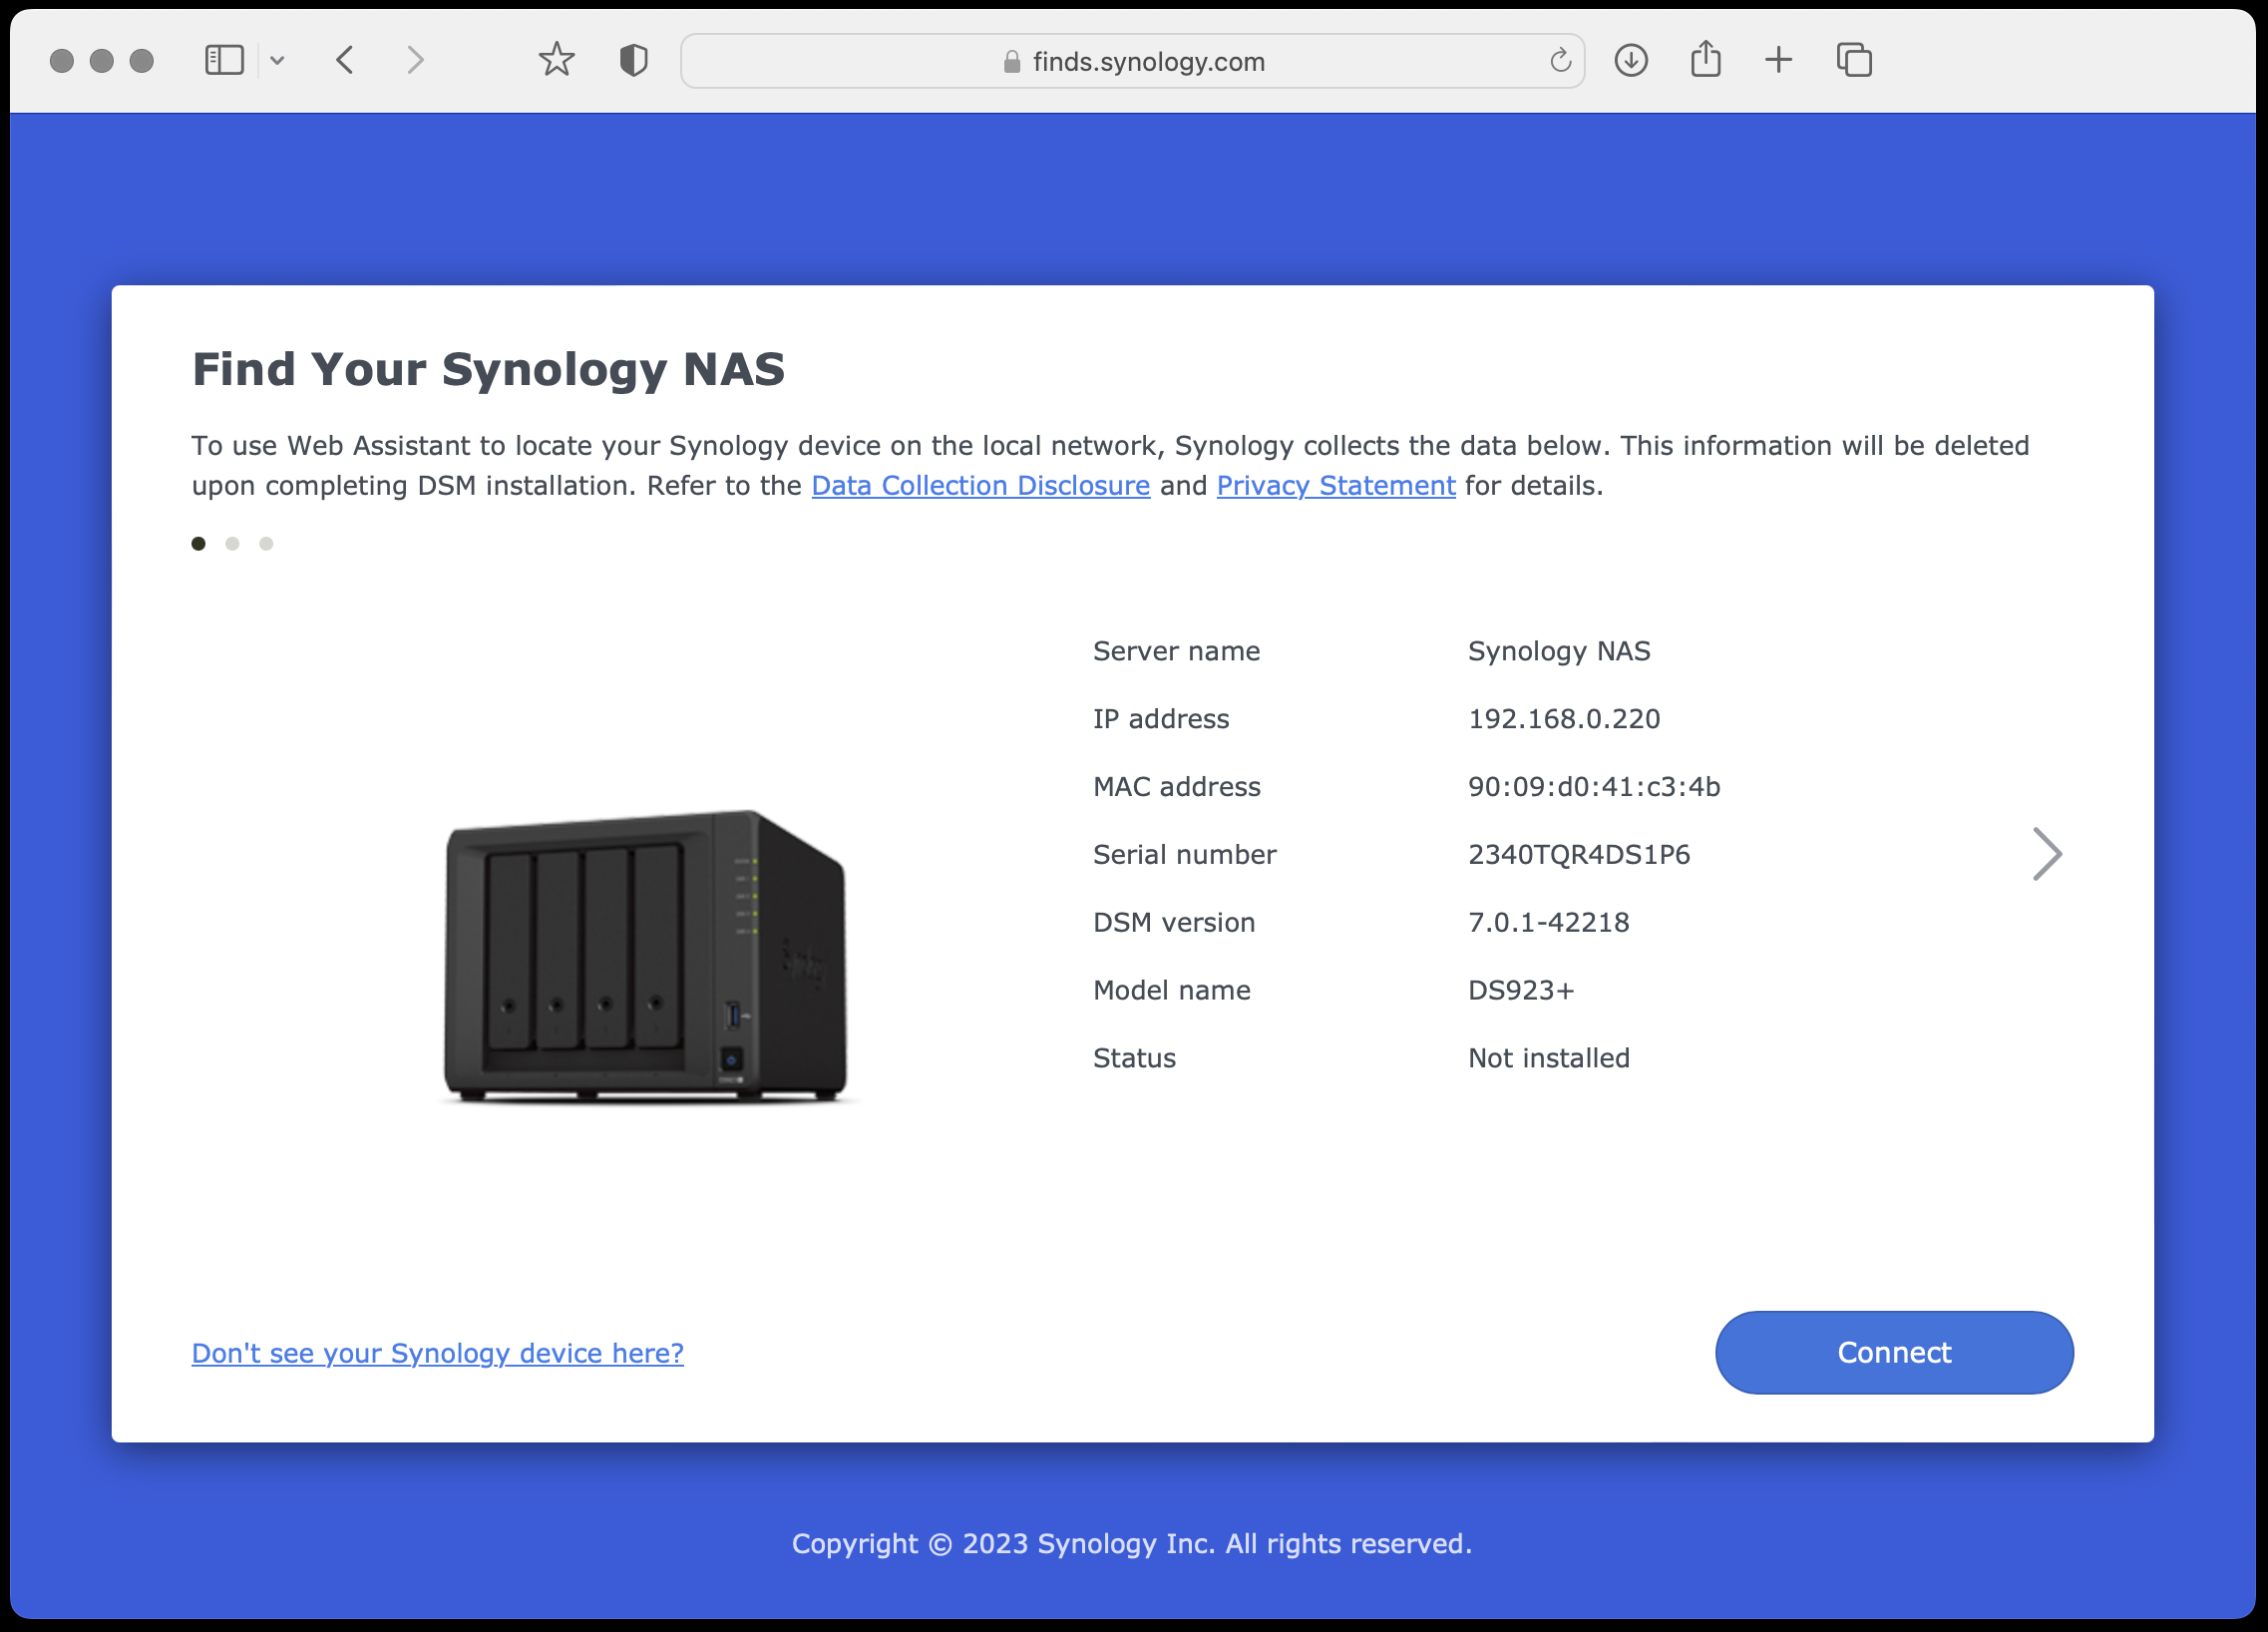
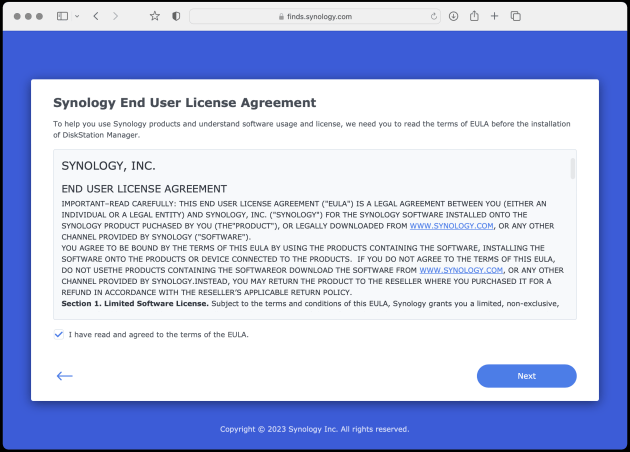
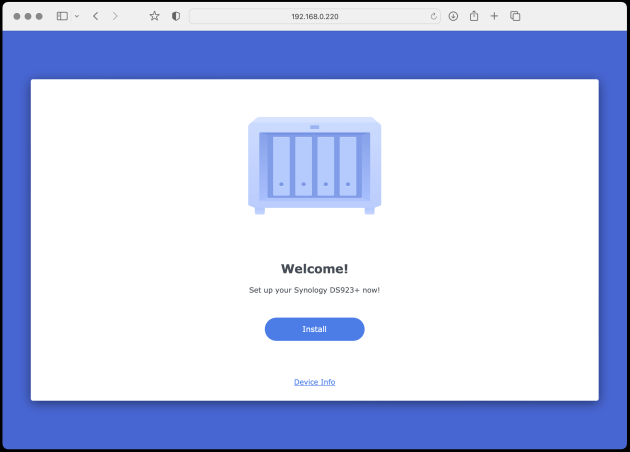
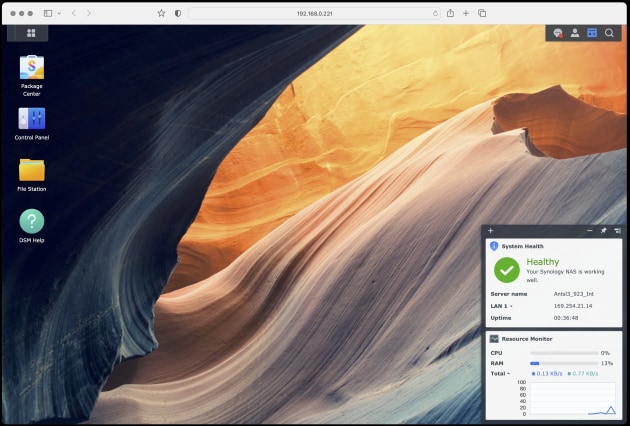
To find the NAS on your network, open a web page and type into the address bar “find.synology.com”. A page will appear telling you it is searching for a Synology device and a few moments later your new NAS should appear on the page, along with a button saying “Connect”. Click on this button and the next page to appear will be an End User Agreement. Tick this box, then click Next.
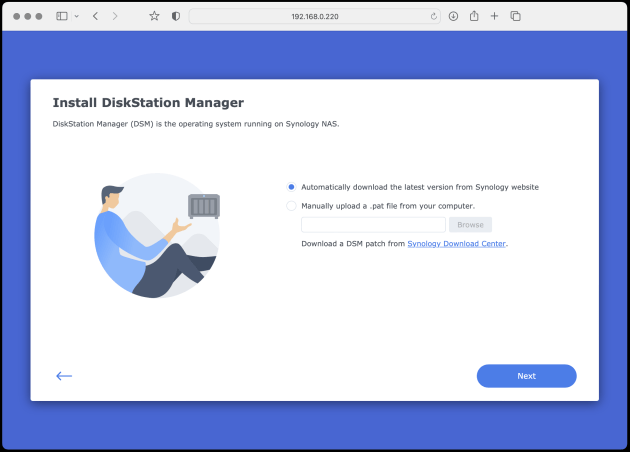
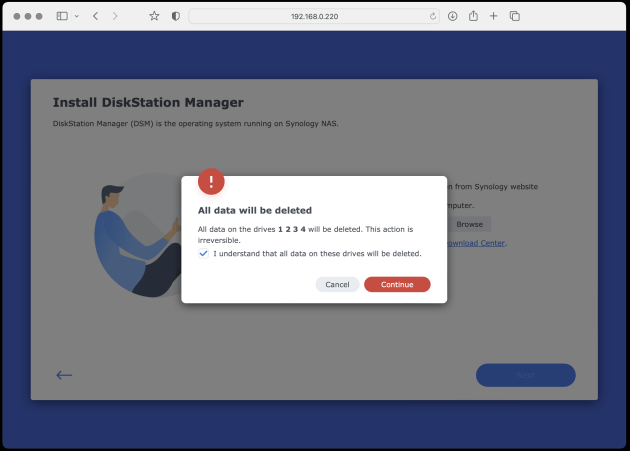
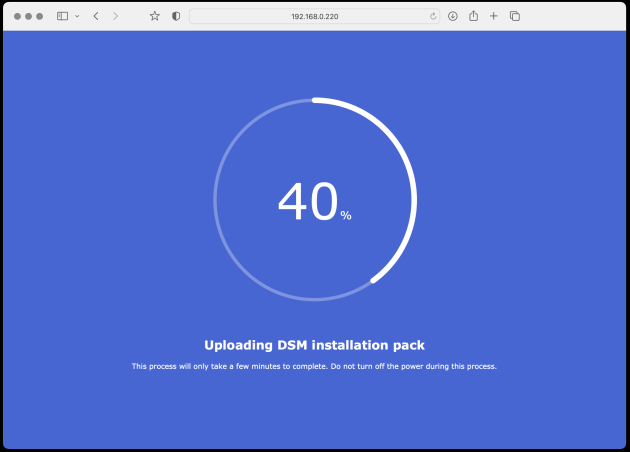
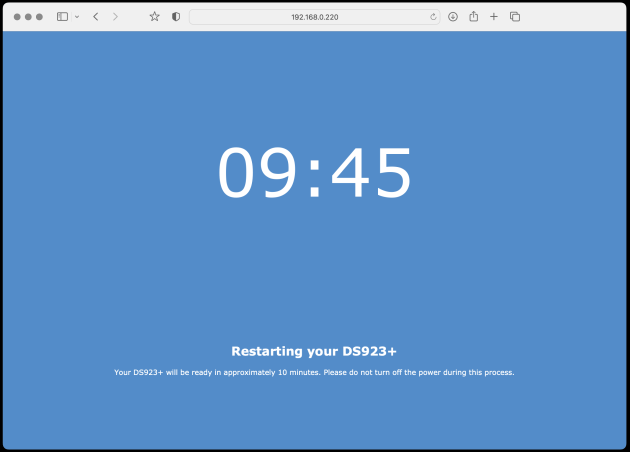
The following Set-Up page is where you get to install the Disk Station Manager onto the NAS. Click “Automatically download the latest version from Synology Website” and then click on the Next button. A warning will come up telling you it is going to delete all the data on any drives within the NAS – this is all good; click on the “I understand” button and then click Continue. The NAS will download and install the Disk Station Manager (DSM); it will take a few minutes.
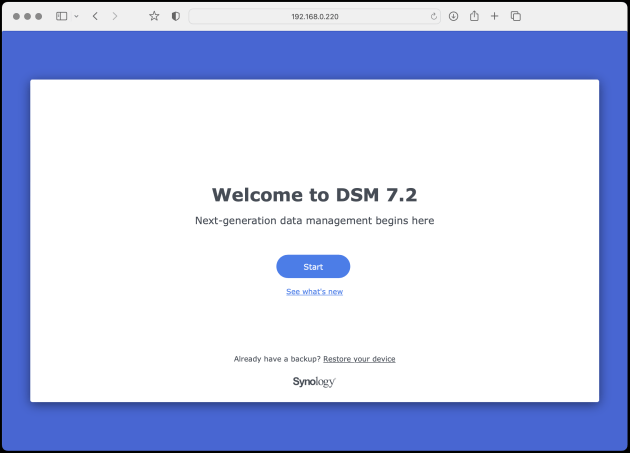
Step 5: Personalise the NAS
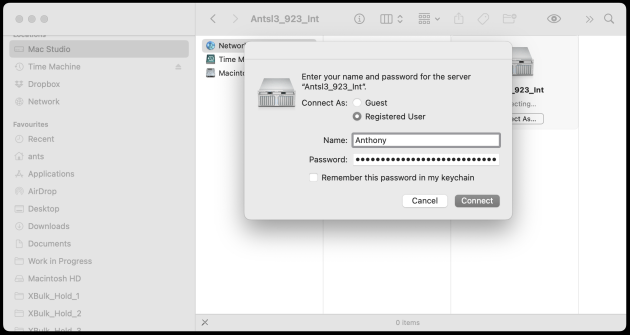
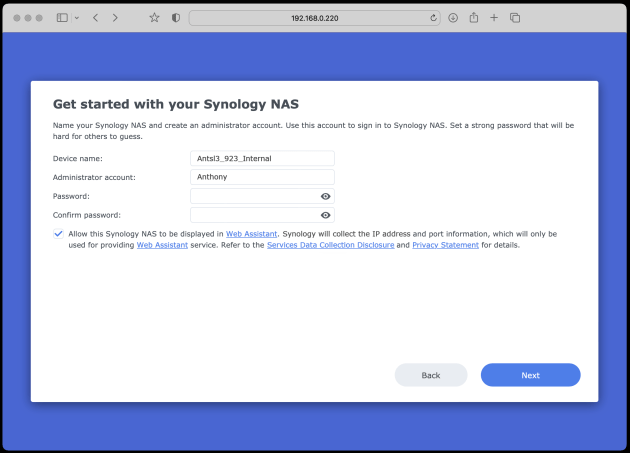
The next step is to personalise the NAS. After clicking the Start button you will come to another page that asks for the Device Name; I tend to give this a name that reminds me that it is my NAS, hence Antsl3_923_Internal. Antsl is my nickname, 923 is the model number of the NAS, and Internal reminds me that I am keeping this device off-line (more on that later). Where is says Administrator account, put in your name and then create a password.
Big tip: The NAS is a network device, and there is always a risk hackers can find it. Your best protection is to create a password that is both unique from all your other passwords, and robust (I use song lyrics with numbers and symbols added in). Now store the password somewhere safe.
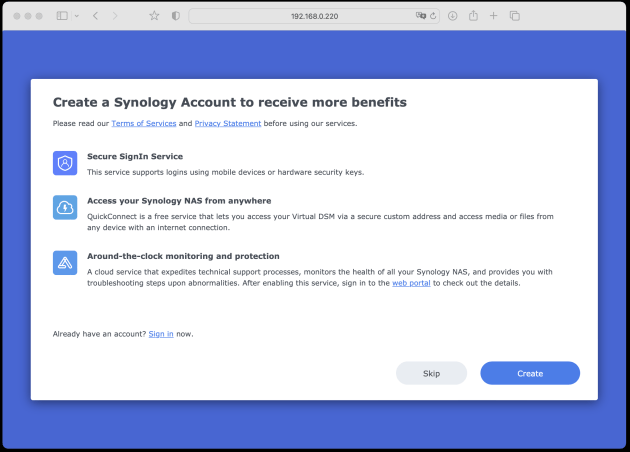
On the next page you will be asked to set up an account with the Synology company. Again, create a unique, strong password. Synology are good at keeping clients informed of their latest news while also supplying you NAS with the latest firmware.
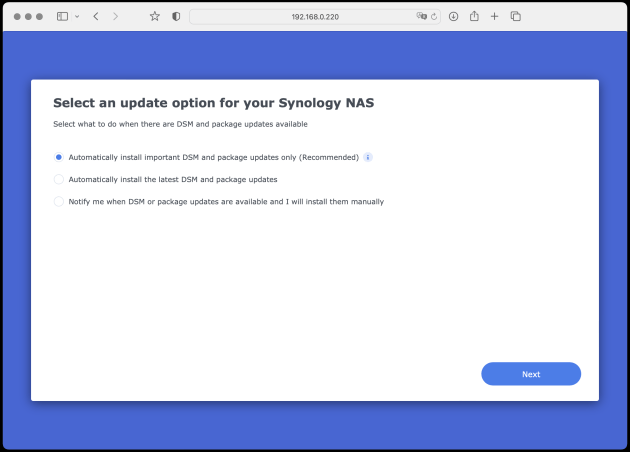
The next page asks you want to update the DSM software; just click “Automatically install important software only”.
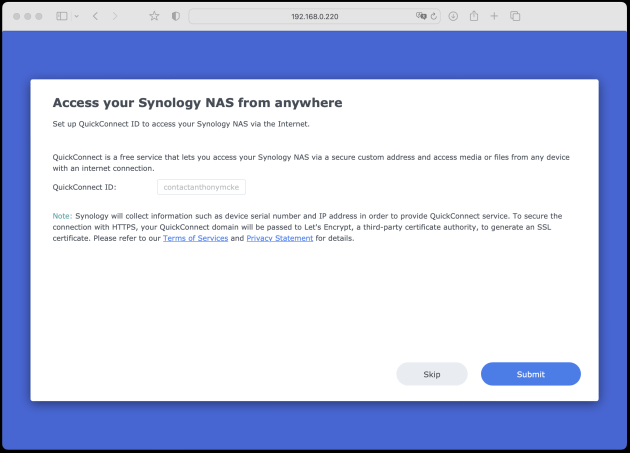
Step 6: Quick Connect Online
Quick Connect allows you to access your NAS from anywhere in the world that you have an internet connection. It can be useful – one of my NAS is set up so that some of my clients can access their photos directly from my NAS. That same NAS is also constantly recording video from four security cameras at my studio and using Synology Surveillance Station Client I can check on what is happening at my studio when I am away.
If your main purpose is to safely archive your work, then I would skip Quick Connect and keep your NAS off-line.
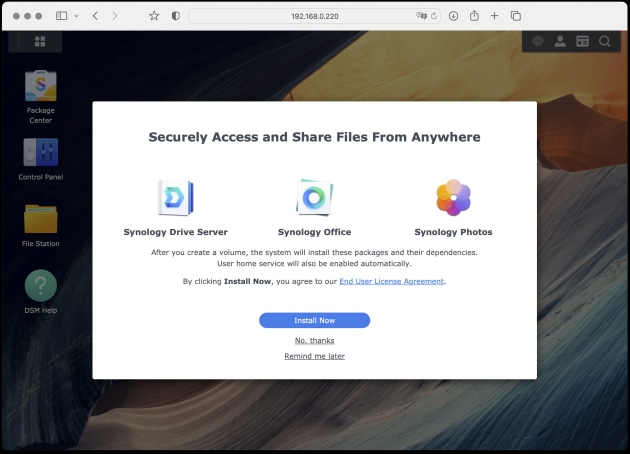
Step 7: Securely Access and Share Files from Anywhere
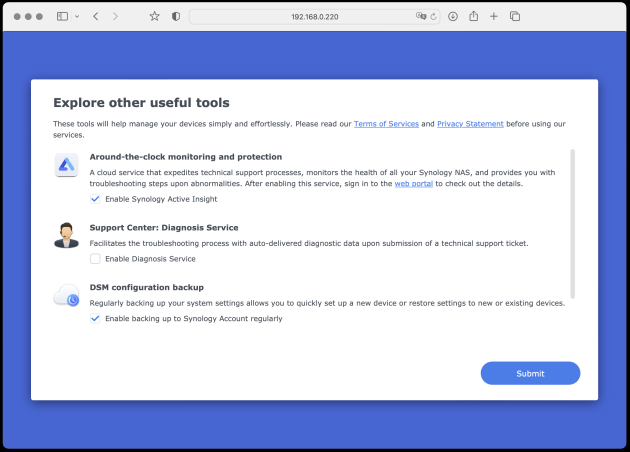
On the next page “Explore other useful tools” – click on “Around the clock Monitoring and protection” and “DSM configuration backup”, and click submit. On the next page you will be asked – “Securely Access and Share Files from Anywhere”? Assuming you have not actioned Quick Connect, click No Thanks.
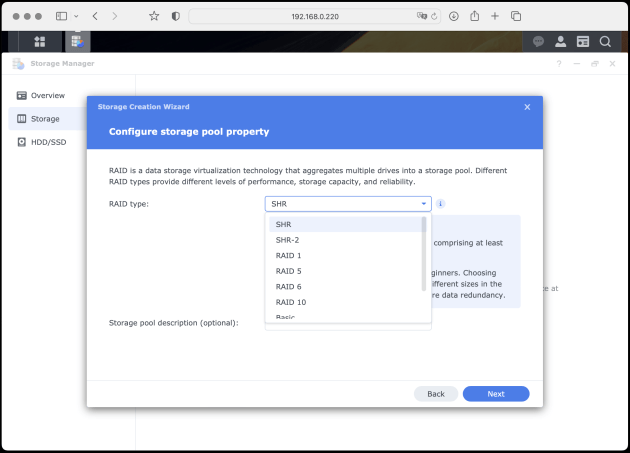
Step 8: Configure the Drives
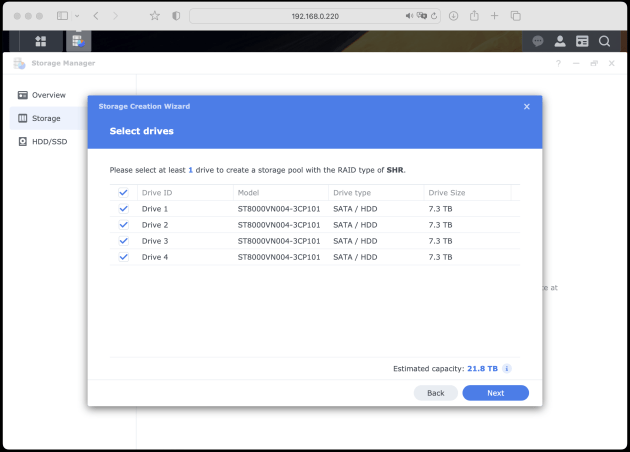
Now we get to set up the storage pool and volumes. This is where you tell the NAS how you want the drives to be configured. After hitting the Start button, you will be asked what RAID configuration you want to use; I would choose SHR (Synology Hybrid Raid) because it will protect your data if one of your disks was to fail.
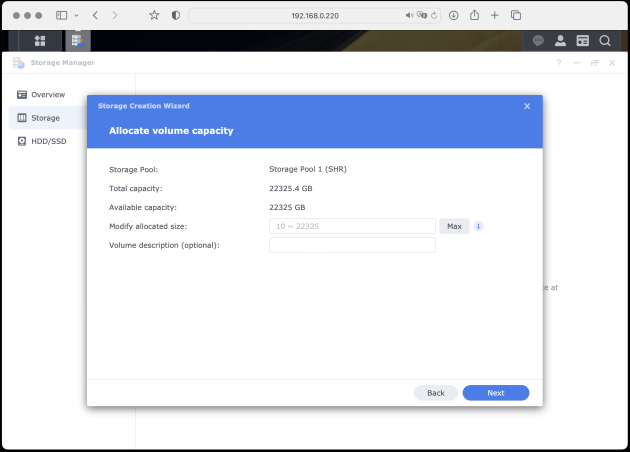
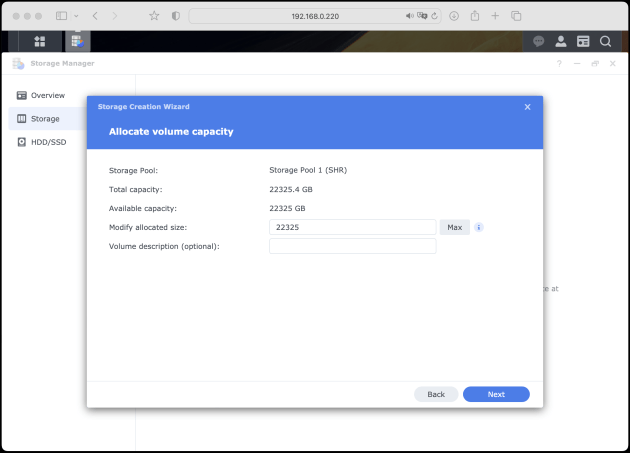
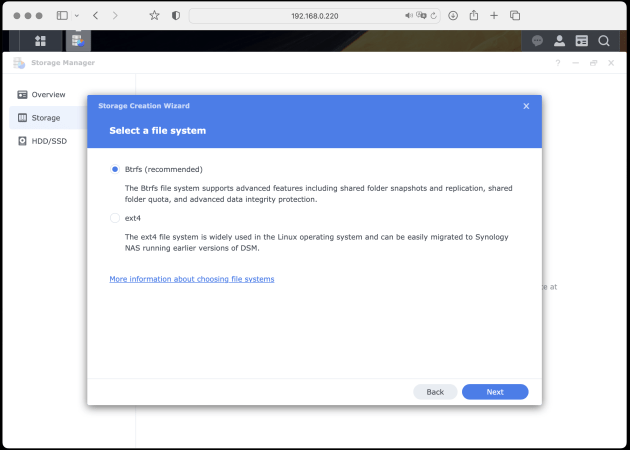
Next you get to create a storage pool; this is a collection of disks where your data will be stored. Again, if you are going for maximum storage efficiency, select all the drives and collect Next. In the next window you will be asked to allocate volume capacity, and again, for maximum efficiency click the Max button and click on Next again. You’ll be asked which file system you want to use. Click Btrfs and go to the next page. Done.

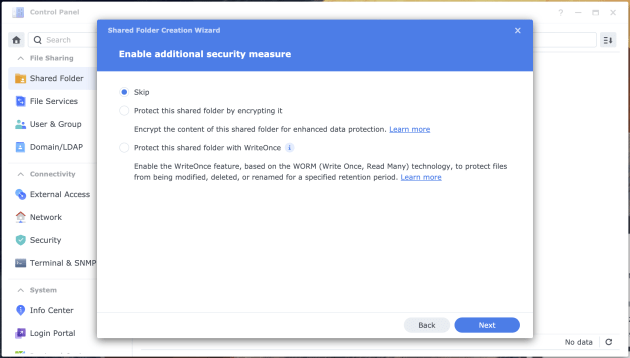
Step 9: Encryption Option
Now we come to the Configure Encryption page. This is dangerous because if you do encrypt this volume and in a few year if time you discover you cannot find the encryption key, ALL the data on your server becomes useless to you. Unless you are archiving boudoir shoots of politicians, I’d be leaving the work unencrypted.
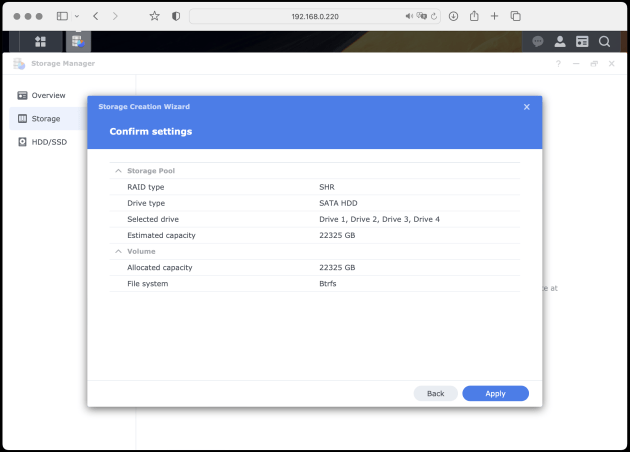
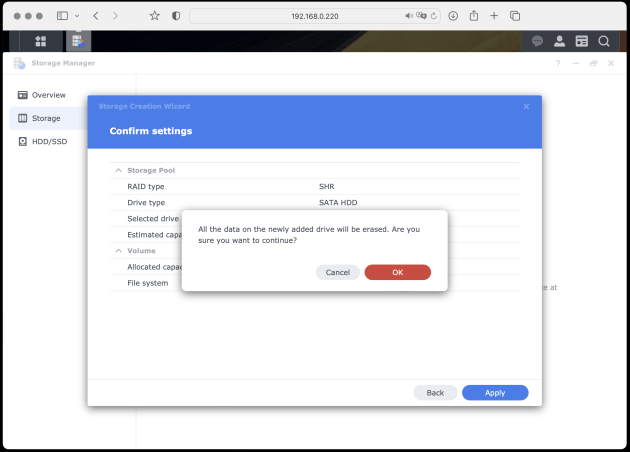
Click through to the next page and you will be asked to confirm the settings that you are going to apply to the volume. Click Apply, then click OK to confirm that you are happy for all the data on the newly added drives to be erased (again) and you are in business.

Step 10: Shared Folder and Finish
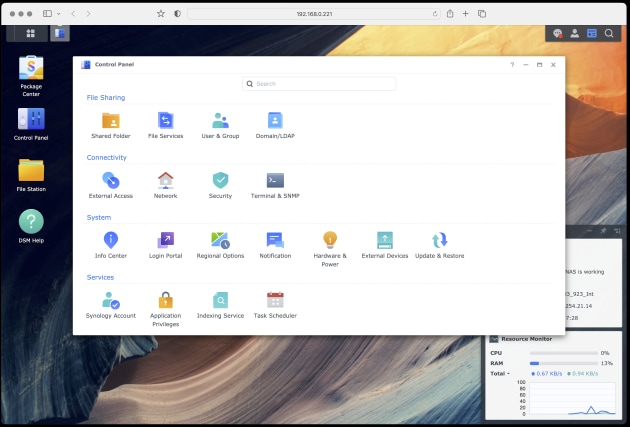
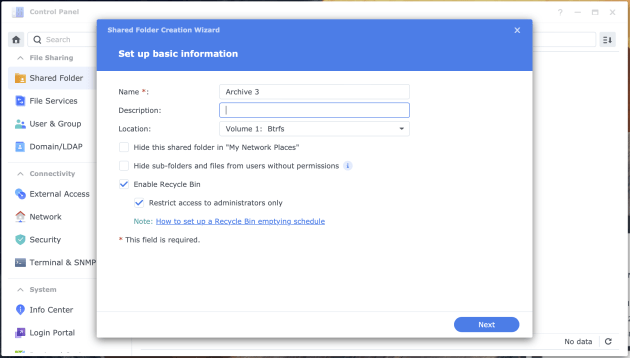
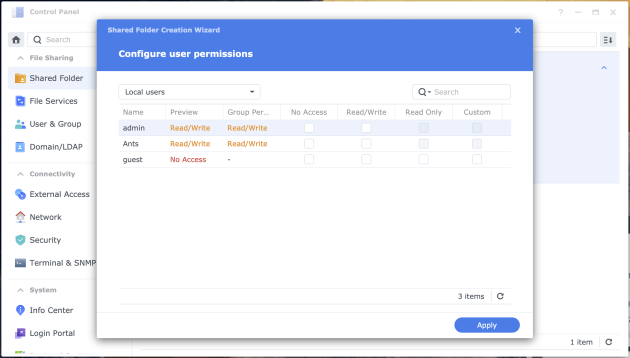
The last step you really need to do is set up a Shared Folder for you to put your Archive. Close the window for the Storage Manager and then go to Control Panel on the Synology DSM and click Shared Folder. Give your new folder a name (I have called this one Archive 3 so that I can easily differentiate it from my other two archive folders) and tick the Enable Recycle Bin box. The next window will ask you if you want to encrypt this next folder, but again, unless you are sensitive work that you are worried about, I would skip this page. Any finally on the last page you can set-up user privileges, although by leaving things unchecked, the default settings will work fine.
The Last Step
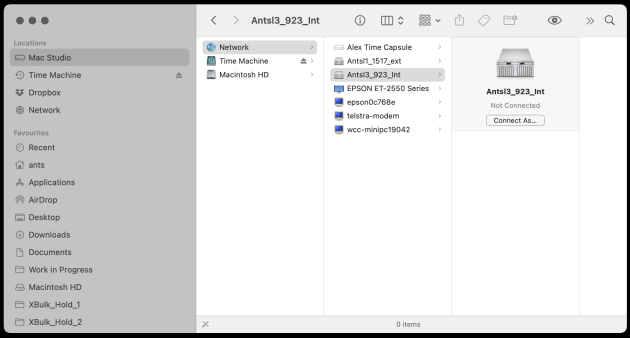
About now you can close the Disk Station Manager window, open a Finder window on your computer and click on the Network tab. Your NAS should be visible under the name you gave it in Step 5. Click on the NAS and you will be asked to put in your username and password and now you are ready to start dragging files across onto your new archive.
As with any good archive, the next step is to keep everything in some rational order. For me, that means having separate folders on the archive for Client Work, Family and Friends, Personal Work (including exhibitions) and whatever else deserves a separate folder. Within each I then have folders year, and within them I have the jobs (or family events, etc) saved by date (YYMMDD) and client name (as in 231029_Synology). This gives me a good chance of easily finding any job on my archive by the date it was shot or the client name.
In all fairness, this set-up is rather basic for a NAS, but so long as you have applied a rugged password to the system it should be safe and reliable for years to come. If ever you do hear a beeping coming from the NAS, use the Disk Station Manager to check on the system; chances are the NAS is informing you that you might need to replace a drive, or some other action. For the most part though, a NAS will be one of the more reliable pieces of equipment connected to your computer.
The NAS system used in this guide is the Synology DS923+ which retails (without hard drives) at time of writing between $800-$900.
You can find out more about the DS923+ on the Synology website.
––––––––––––––––––––––––––––––––––––––––––––––––––––––––––––––––––––––––––––––––––––––––––––––––––––––––––
Setting up a NAS – a visual guide using screenshots.
Below are images you can use to either preview the whole process, or use as a visual step by step guide when you do your own install.