

How to spend more time behind your camera and less behind your desk
When I’m not publishing content on Shotkit about photographers and their camera gear, I’m either spending time with my family, out shooting weddings, or editing photos in front of my computer. And I'm sure that all you Capture mag readers are the same: it’s a sad truth that us photographers spend much more time behind our desks than behind our cameras!
Workflow efficiency is important to reduce the amount of time we spend editing our photos. Based on my experience, below are are 5 tips that can help you achieve this.
#1 – Cull positively
I use Lightroom to cull my photos, but no matter what software you choose to do the job of weeding out the duds, it’s important that you cull positively. Culling positively refers to choosing only the images you wish to keep, as opposed to marking the ones you don’t wish to use.I used to cull negatively, pressing the ‘x’ key to mark photos I wanted to reject, and additionally mark the photos I wanted to keep with a certain star rating.
Culling positively is not only faster, but it’s a Lightroom tip that will also affect your mood, especially when you consider that you cull thousands of photos each week. Each time you press your designated selection key (I use the number ‘1’ to give the photo a star), you’re effectively saying, “I like this photo!”
Compare that to saying, “This photo sucks” hundreds of time when you press your reject key, and you’ll quickly understand why you might be feeling a bit depressed about your work!
Be sure you set Lightroom up to ‘auto-advance’ (in the menu, Photo –> Auto Advance), so that when you press your selection key, the next photo will appear. If you don’t like the next photo, just hit the right arrow key to advance to the next one, and so on.
When you reach the end of your images, filter by 1 star (or whatever selection method you used), and start your editing.
#2 – Use Smart Previews
This is a Lightroom-specific tip on speeding up your workflow. When you import your photos into Lightroom for editing, make sure you tick the box, ‘Build Smart Previews’. This will add some time to the import process, but the speed benefits of editing with Smart Previews are huge.
With Lightroom CC (2015.7) and Lightroom 6.7, Adobe introduced the ability to use Smart Previews instead of your original files for editing. You can toggle this on via the menu (Edit –> Preferences –> Performance –> Develop –> Use Smart Previews Instead of Originals for Image Editing.)
This is great, but I’ve found that actually disconnecting your external hard drive, or temporarily renaming the folder which contains the original image, actually yields better results. Essentially you’re forcing Lightroom to use the Smart Previews for editing, since it can’t find the originals. In testing, using this ‘hack’ method still yields faster results than using the new built-in functionality of the software.
Have a test yourself and see if you agree. Check out the video below for a quick explanation.
#3 – Export at 75
This is a tip that I include in a free Lightroom Tips ebook, and has proved to be very popular. It’s something that you can implement straight away to have a huge impact on your post production workflow.
Most people export all their files from Lightroom at 100% quality – I mean, why wouldn’t you?! Next time, try exporting at the Lightroom JPG export quality of 75, and you’ll end up with a photo that looks identical to one exported at 100, except it’ll be about one third the size! It’s no secret that having smaller file sizes can help speed up your workflow immensely. And being able to transfer images to your hard drives for backup or upload them to the cloud much faster can save you hours.
As an added bonus, a smaller image file will do wonders for your website loading speed too, and in addition, your SEO. Google has said for many years now that site speeds directly affect rankings, so make sure you have a go at reducing your images for online usage.
#4 – Use software shortcuts
Do you use keyboard shortcuts when editing your photos? Most photographers use Adobe Lightroom and Photoshop every day, and often for hours at a time, so it makes sense that we should be using every shortcut available to us.
Virtually every tool you can use and action you can perform in Lightroom and Photoshop can be accessed via a keyboard shortcut. There are literally hundreds of them, which is great, but it does pose a problem – how to remember them all?!

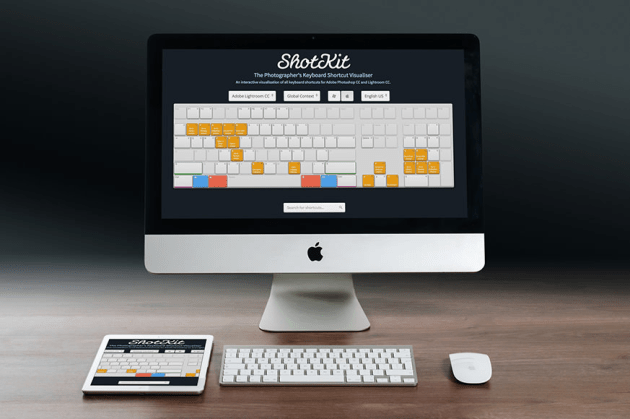
Recently on Shotkit, I launched a free tool that will help you research all the available Lightroom and Photoshop shortcuts. It’s a virtual keyboard that displays information on the various shortcuts depending on key combinations you press on your actual keyboard. If you add one or two new shortcuts to your editing arsenal every time you use one of the Adobe Photography Suite’s products, you’ll soon be shaving hours off your post production.

#5 – One job at a time
I thought I’d end up on a workflow tip that’s not related to software, cameras, or even photography. However, if you can follow it, it’ll have the biggest impact on your workflow.
We all may like to think we’re good at ‘multi-tasking’, but in reality, our brains don’t actually work like that. Instead of doing several tasks well, multi-tasking actually spreads our efficiency in multiple directions, often meaning we’re not doing any of the tasks to our full capabilities.
Whether editing photos, blogging, e-mailing, or researching, it’s often far more productive and efficient to stick to one single task until it’s completely done. It also helps to ‘batch’ similar tasks, working on them all together rather than interjecting them with other random jobs on your to-do list.
As an example, try blocking off a couple of hours to just work on your photography marketing. Close all other distracting apps on your desktop, and stick at that one task until it’s completely done. Then and only then, move onto the next.
It sounds so simple, but it’s actually quite hard to achieve! In our daily lives, we’re constantly bombarded with media from all angles, making it harder and harder to focus on the one task at hand. See if you can focus on one type of task at a time the next time you’re at your desk, and let me know how it affects your productivity.
Final words
I want to round this guest post off by thanking Marc Gafen, the editor at Capture mag, for all his efforts in producing such an amazing publication, and for having me here on the blog today.
If you’re interested in learning more about productivity, workflow efficiency, camera gear, and photography, sign up to the free Shotkit newsletter. I look forward to seeing you a part of the community ;-)
About Mark Condon
Mark Condon is a Nottingham wedding photographer based in Sydney. He is the founder of Shotkit and author of the Shotkit Books, Lightroom Power User, More Brides, and LIT.